Microsoft Bot Framework makes it much esier for developers to create our own bots.
A bot system developed using Bot Framework will look like this:(source)
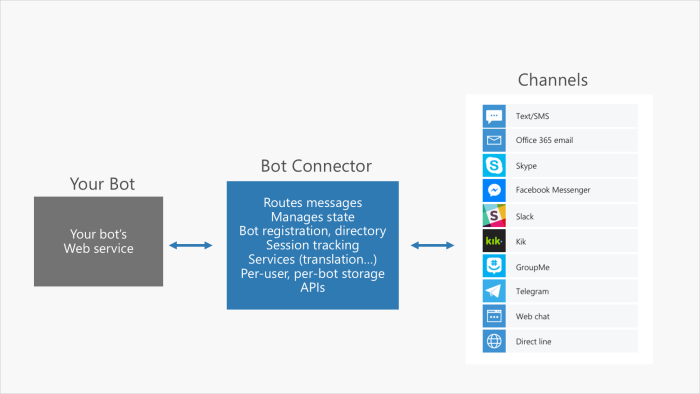
Bot Connector mainly help us to handle the basic I/O like receiving and sending messages from/to users, connect to different channels which users directly interact with. With help of Bot Connector, developers can focus on building the bot that has the actual logic about how to response to users.
When building the bot, one of the main challenges is understanding what the user wants. Normally, you need people to have expertise in areas like machine learning, nautural lanuges processing to work on this part. But now Microsoft provides Language Understanding Intelligent Service (LUIS) to help us do this hard work. It’s another great contribution from Microsoft to democratize advanced technology and empower developers.
Step1: Set up the development environemt
You can follow this offical tutorial to set up the development environment and create a Hello World bot.
http://docs.botframework.com/connector/getstarted/
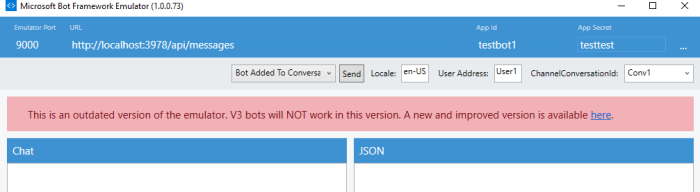
After you have done this, you should have a simple Bot application running with Bot Framework Emulator. When you type something in the Emulator, you should get simple response from the bot.
Step2: Bot Builder SDK and Dialog
In order to make bot smarter and can handle more complex conversion with user, we need to use Bot Builder SDK. You can install it simply from Nuget Package Manager.
The core concept in Bot Builder SDK is Dialogs. Dialogs are abstraction of a conversation process. Each dialog encapsulates its own state in a C# class that implents IDialog. A conversaction state is then composed of a stack of active dialogs that is stored in the messages exhanged with the Bot Connector.
In order to understand this concept, you can follow the first two examples in the documentation:
http://docs.botframework.com/sdkreference/csharp/dialogs.html
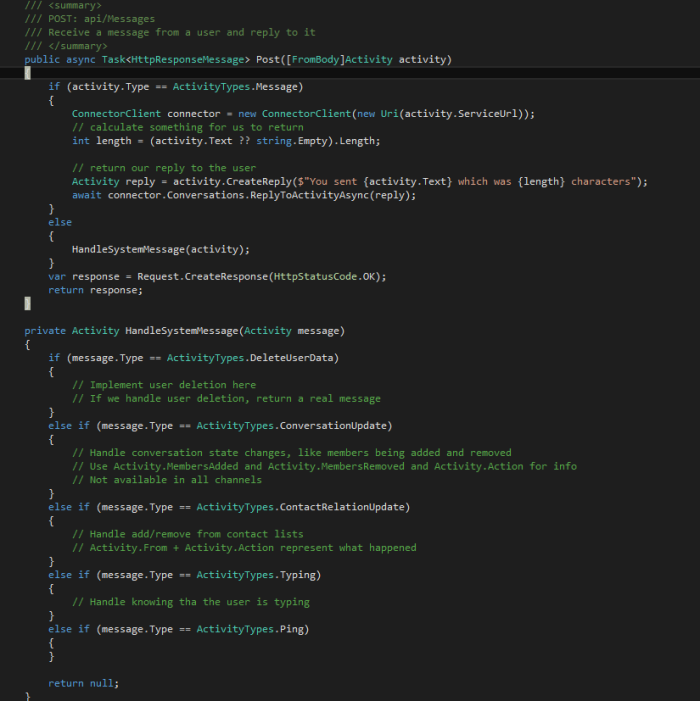
The first example changes the code in the Bot Framework template (our hello word bot) to use dialogs from the Bot Builder. The second example, Echo Bot with State builds on that to add some simple state.
After you have done the first two examples, you should get basic understanding of Dialog. By adding more complex logic, you can have bot that is able to handle simple conversion with users.
Step3: Set up LUIS
In the documentation above about Dialog, it provies a example of using LuisDialog to integrate LUIS service. I find the example is not so straightforward. So from this step, we will look at how to set up LUIS and integrate it into our bot.
You can follow this very good introducation video from Microsft to create a simple LUIS application called TravelAgent step by step.
Introduction to Language Understanding Intelligent Service (LUIS) – Microsoft Cognitive Services
After following the video , we should create the LUIS application TravelAgent.

The key things we have created in this LUIS application are two intents (GetWeather and BookFlight) and three entities (Location and its two child entities FromLocation and ToLocation).
Step4: Integrate LUIS application with Bot using LuisDialog
LuisDialog is a dialog specialized to handle intents and entities from LUIS. What we need to do is binding our intents and entities in LuisDialog with our LUIS application.
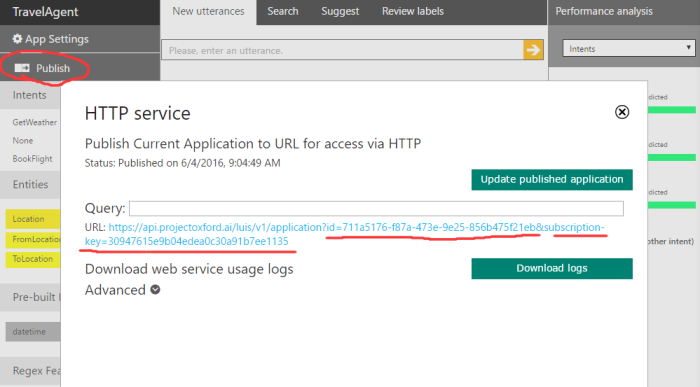
- Bind our LuisDialog with LUIS application. We need to find the modelID and subscription key in LUIS application.
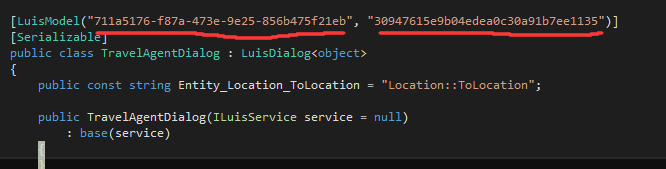
You can go to LUIS appllication, Click the Publish buton. The URL shown in the popup contains these two keys.
2. Bind the intent to the method using LuisIntent atribute.
In our LuisDialog, we create a method to handle each intent. The way to bind the method to LUIS intent is using LuisIntent attribute. The parameter of the attribute should be the exactly same intent name in LUIS application.
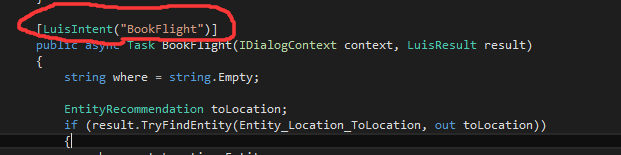
3. Use LUIS entity by enity name.
When using the LUIS entity, we just need to use the same entity name in LUIS application. Normally, you can create a const to store the entity name to in order to easily reuse and maintain it.

For full example code, check out on my github

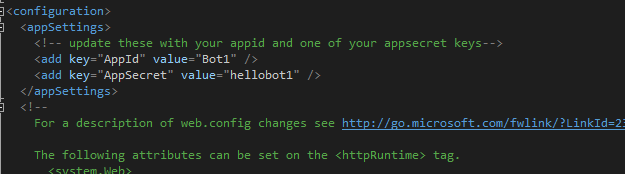 Now it becomes this:
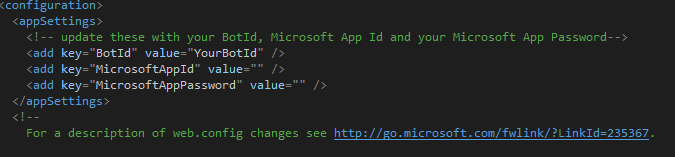 So we get a new setting for Bot ID.
 Now we don’t need to do this anymore. Just keep them empty like this:
 Otherwise, you will get internal exception when typing a message.