What is Entity Framework?
Entity Framework (EF) is an object-relational mapper(ORM) that enables .NET developers to work with relational data using domain-specific objects. It eliminates the need for most of the data-access code that developers usually need to write.
What ORM does is helping us take care of creating connections and commands, and execute them on database. When you are performing queries, it will take the results of the queries, read the data from them, create instances of your domain classes, and push the data into the instance. All of that repetitive work is taken care of by an ORM, in this case Entity Framework.
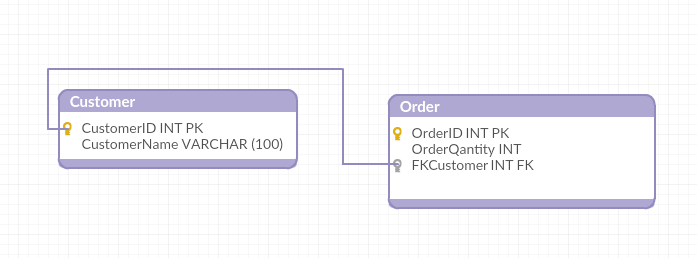
The key feature of ORM is the mapping it uses to bind an object to its data in the database. Mapping expresses how an object and its properties and behaviors are related to one or more tables and their fields in the database. An ORM uses this mapping information to manage the process of converting data between its database and object forms, and generating the SQL for a relational database to insert, update, and delete data in response to changes the application makes to data objects.
So instead of writing commands like this every time before EF:
String sql = “SELECT … FROM Users WHERE ID = 123”
DbCommand cmd = new DbCommand(connection, sql);
Result result = cmd.Execute();
String name = result [0][“NAME”];
You do something like this:
User user = User.Get(User.Properties.Id == 123);
string name = user.Name;
Why Entity Framework?
In additional to the benefits as an decent ORM framework has, EF also has two other advantages:
- It is the first class member in .Net stack.
- We can work with Entity Framework using the consistent query syntax with LINQ to Entities.
Geting start with Entity Framwork 6
Environment: Visual studio 2015 Community + SQL Server 2014 + ASP.NET MVC 5
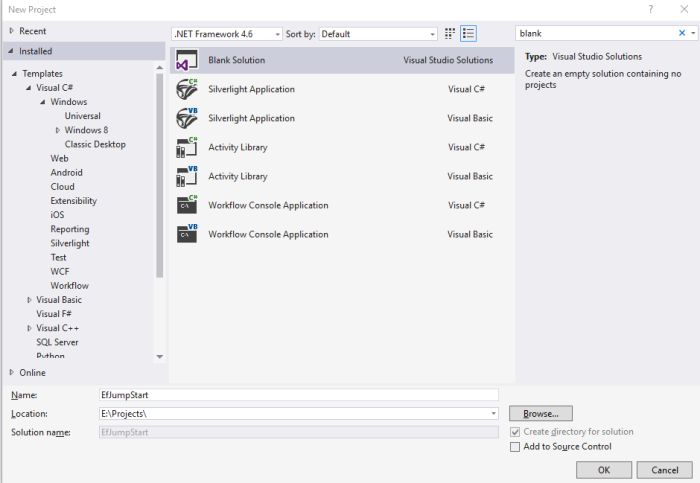
1) Create a Blank Solution called EfJumpStart.
2) Add a new Class Library called EfJumpStart.Domain. 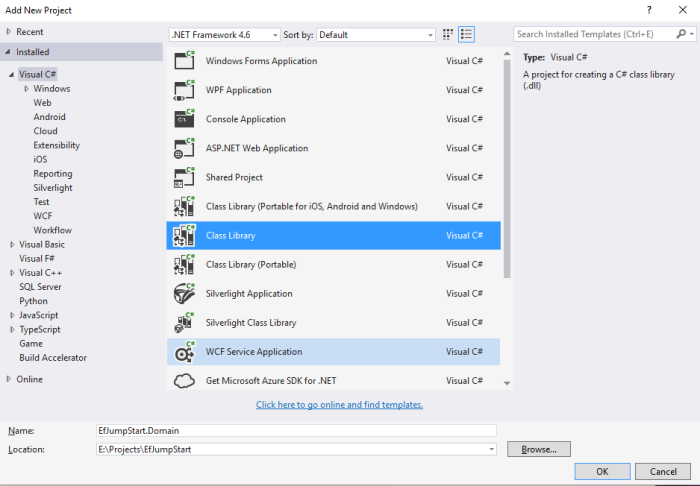
3) Create our domain class. For example, here I create a class caled User. 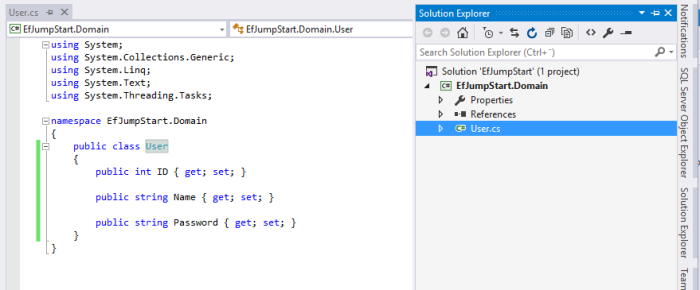
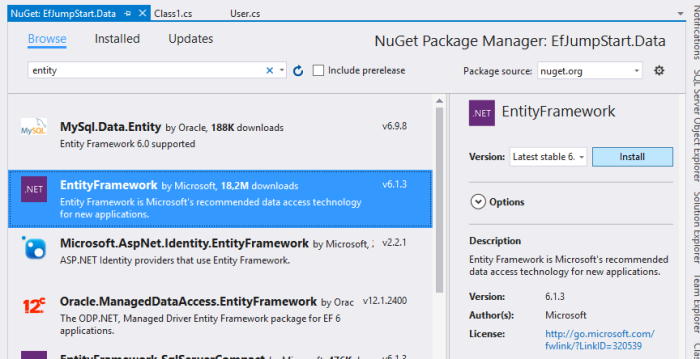
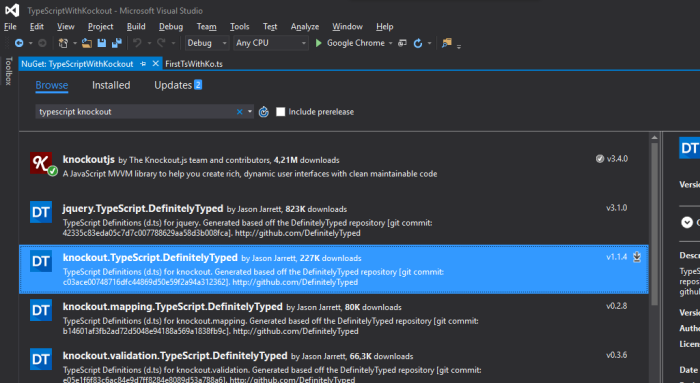
4) Add a new Class Library project called EfJumpStart.Data which is our data access layer. In this project, we need to Install lastest version of Entity Framework package.
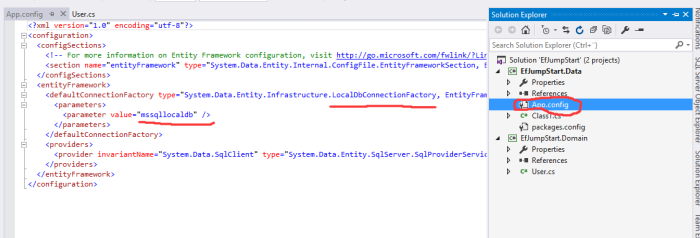
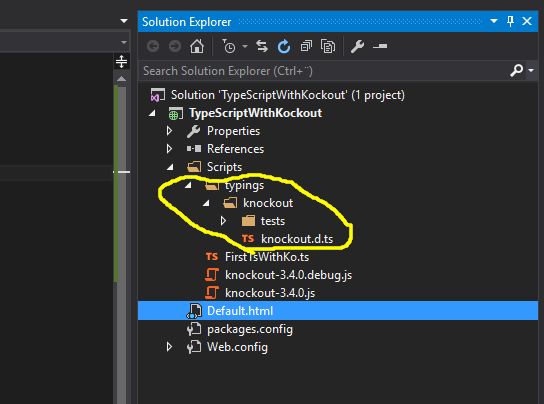
After installation, you will see that we not only get two new package references, but also an App.config file. In the App.config, we can see that Microsoft SQL Server LocalDB is used by default. We will just use it for now. But later i will show you how to switch to Sql Server easily.
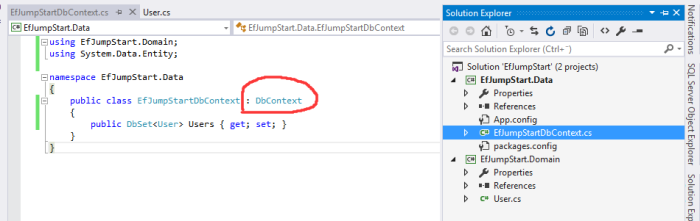
5) Now we will get into the important party of Entity Framework: DbContext.
DbContext is the primary class that is responsible for interacting with data as objects. The context class manages the entity objects during run time, which includes populating objects with data from a database, change tracking, and persisting data to the database. Once you have context, you would need to access DbSet in DbContext. DBSet class represents an entity set that is used for create, read, update, and delete operations. (Reference link)
Intuitively, a DbContext corresponds to your database (or a collection of tables and views in your database) whereas a DbSet corresponds to a table or view in your database. So it makes perfect sense that you will get a combination of both! You will be using a DbContext object to get access to your tables and views (which will be represented by DbSet’s) and you will be using your DbSet’s to get access, create, update, delete and modify your table data. (Reference link)
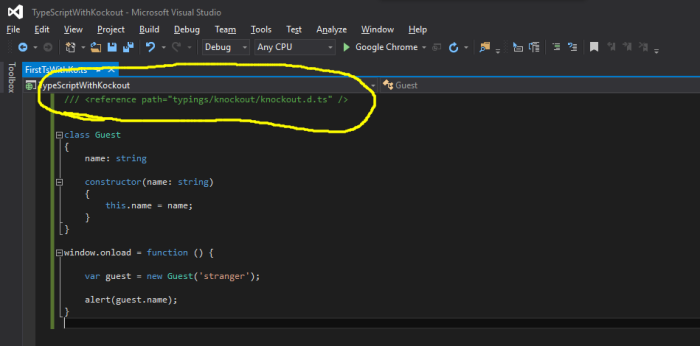
Now let’s create our DbContext. The recommended way to work with context is to define a class that derives from DbContext and exposes DbSet properties that represent collections of the specified entities in the context. (See following screenshot. )
6) Create a Database from the model using Code First Migration
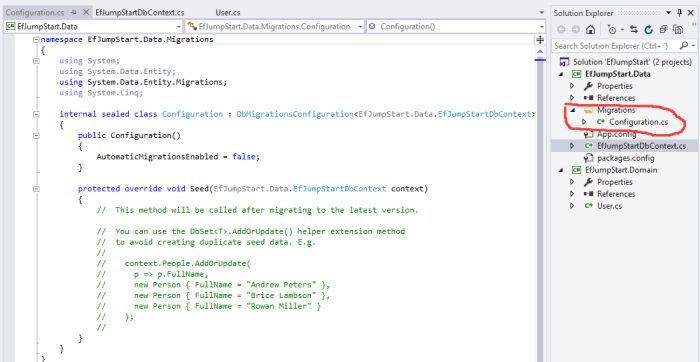
First, we need to enable migration from Package Manager Console for EfJumpStart.Data project.

You can see that EF has generated a folder and configration class for us.
Now we will perform Code First Data Migration. It’s a three-steps process.
- Define/Change the model
- Create a migration file
- Apply the migration to Database
Since we already created a domain class called User. Then we can start to create a migration file.
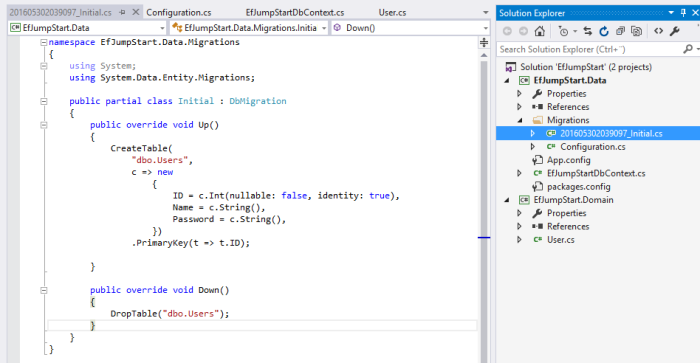
The command is Add-Migration + MigrationName. Here I name the first migration as Initial.

After it is done, we can see that a migration file is auto-generated for us. It basically describes what needs to do for achieving current migration and reversing the migration. Since this is our first migration, it is about creating a new table.
Now it is time to apply the migration with the changes described in the migration file using command update-database. It’s recommended that we add -verbose option in command. So we can see what this command has done behind scene.
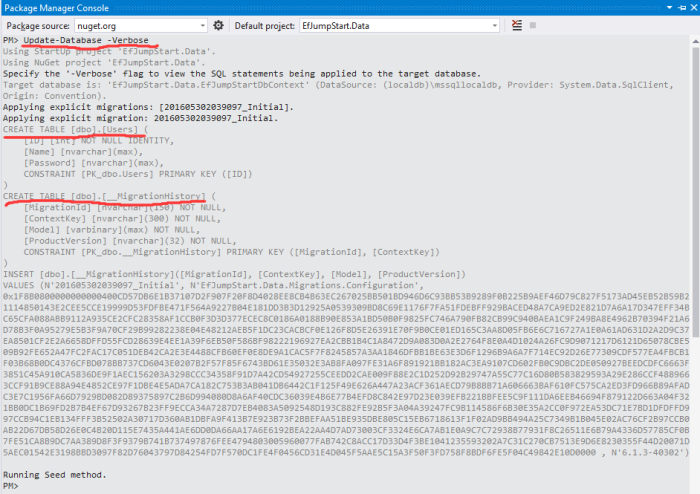
From the screenshot above, you can see that it shows what SQL commands were executed during migration. And in the end, what it did was creating a migration history in the Database. SO next time when we try creating new migration file, the EF will compare the changes in the models with previous migration history to determine what changes needs to be done and generate new migration file for us.
Now we can go to see the new database has been created for us by EF.

7) It’s time to interact with data.
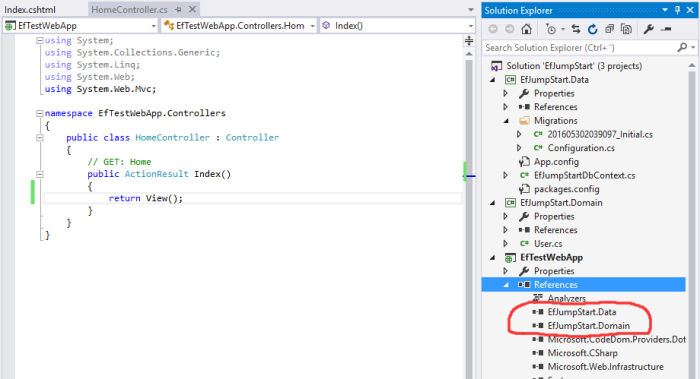
We can create a simple ASP.NET MVC 5 application. It contains a simple HomeController with a action called Index and its view called Index.cshtml.
First, Reference our Domain and Data project. And we also need to install Entity Framework as well.
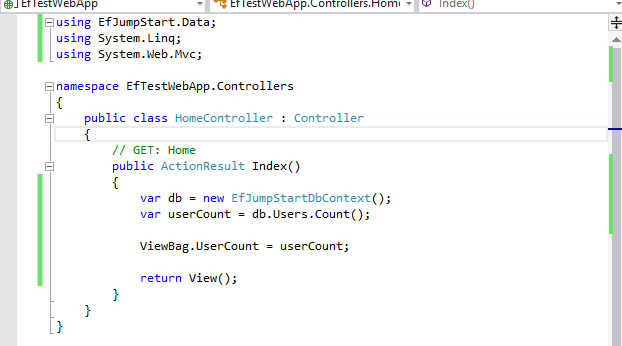
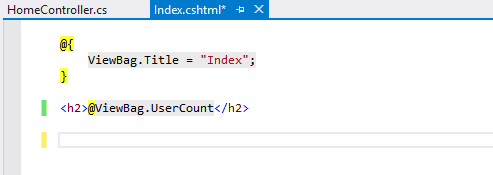
Second, let’s use our DbContext class. See following action and view code.
Now let’s run the MVC applicaiton.
Ops, we get follwing exception.
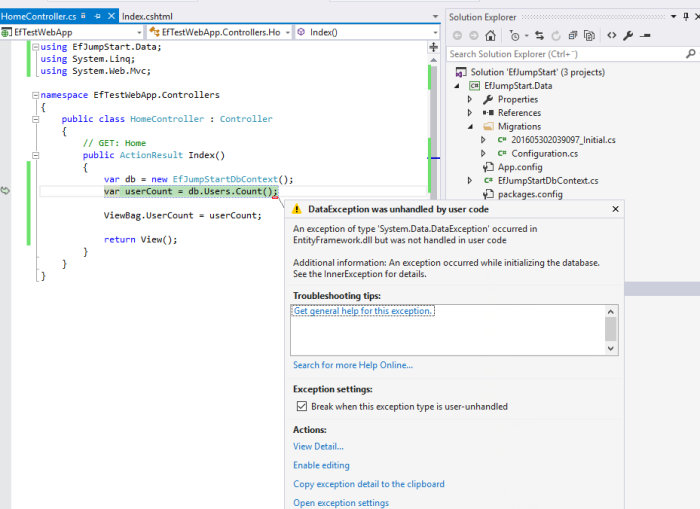
By checking the InnerException details, it says “The underlying provider failed on Open.” This means that we didn’t connect to SQL Server successfully. In our MVC application, we need to config the applicaiton to connect to our database.
The fix is that adding following connection string in Web.config file. This will connect to the database Ef created for us in LocalDB.
<connectionStrings>
<add name=”EfJumpStartDbContext”
connectionString=”Data Source=(localdb)\MSSQLLocalDB;Initial Catalog=EfJumpStart.Data.EfJumpStartDbContext;Integrated Security=True;”
providerName=”System.Data.SqlClient” />
</connectionStrings
Now run the MVC application and it works!
8) Switch to full version of SQL Server
In reallity, we will use full version of SQL Server instead of SQL Server LocalDB.
First, go to SQL Server Management Studio(I am using SQL Server 2014) and create a new database. For example, the database name is EfJumpStart.
Then just change the connection string to the following one
<connectionStrings>
<add name=”EfExamplesDbContext”
providerName=”System.Data.SqlClient”
connectionString=”Data Source=YourServerName; Initial Catalog=EfJumpStart; Integrated Security=True;MultipleActiveResultSets=True” />
</connectionStrings>
Now if you run the MVC application, the EF will do the code first migration in SQL Server 2014 automatically and create the table for us again.

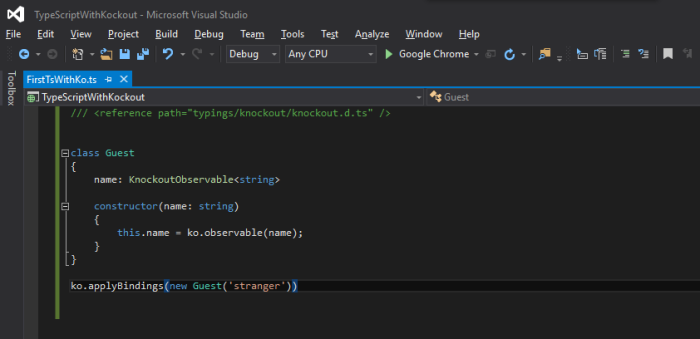

 Now it becomes this:
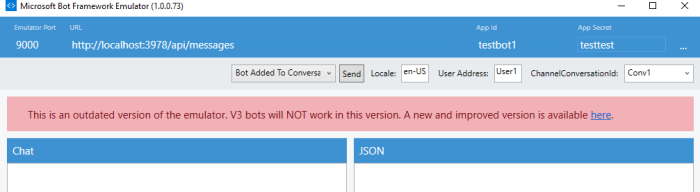
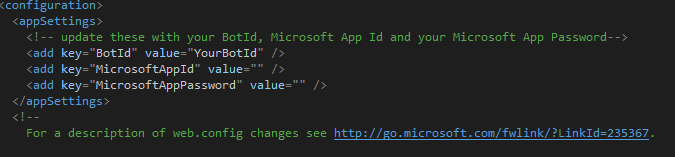 So we get a new setting for Bot ID.
 Now we don’t need to do this anymore. Just keep them empty like this:
 Otherwise, you will get internal exception when typing a message.